Set up single sign-on and automatic user provisioning
Let your people sign in with your own identity provider and create or deactivate their accounts automatically.
A Lavawall® task guide: 8 steps across 2 console pages.
Before you start
- Who can do this: Super Admin, MSP Client Administrator, or a user who has been given the User Permissions permission
- Plan: Included with every Lavawall® account. See pricing.
- Where to start: open Users & Permissions in your console.
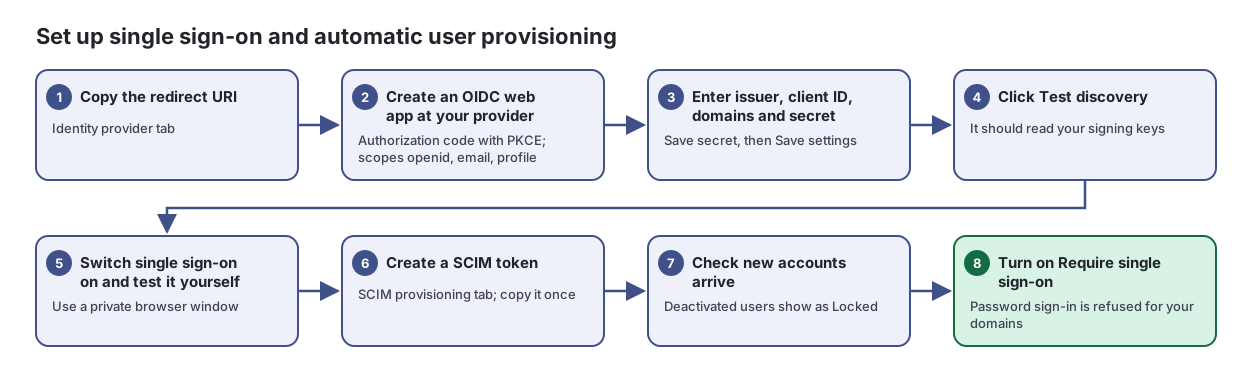
Steps
- Copy the redirect URI. Identity provider tab
Let your people sign in to Lavawall with your own identity provider, and create or deactivate their accounts automatically.
From the article: How to connect your identity provider
- At your identity provider, create a web application using the authorization code flow with PKCE, and set its redirect URI to the Redirect URI (callback) shown here.
- Give it the scopes openid, email and profile (plus your groups scope if you want group mapping).
- In Lavawall, enter the Issuer exactly as your provider shows it, the Client (application) ID and the Email domains this provider owns. Enter a button label in What your people will see, such as "Sign in with Okta".
- Create a client secret at your provider, paste it into Client secret and click Save secret.
- Click Save settings, then Test discovery. It should read your provider's signing keys.
- Tick Single sign-on is switched on and click Save settings.
- Create an OIDC web app at your provider. Authorization code with PKCE; scopes openid, email, profile
- Enter issuer, client ID, domains and secret. Save secret, then Save settings
- Click Test discovery. It should read your signing keys
- Switch single sign-on on and test it yourself. Use a private browser window
- Create a SCIM token. SCIM provisioning tab; copy it once
From the article: How to set up SCIM provisioning
- Open the SCIM provisioning tab and copy the SCIM 2.0 base URL into your identity provider.
- Click New token, enter what will use it (for example "Okta provisioning") and click Create.
- Copy the token from the window and paste it into your provider, then click I have copied it. It is shown only once.
- To stop a token, click revoke on its row and confirm. Anything using it stops provisioning at once.
- Check new accounts arrive. Deactivated users show as Locked
See everyone who can sign in to Lavawall for your company and your clients, and control what each person can do.
- Turn on Require single sign-on. Password sign-in is refused for your domains
From the article: How to require single sign-on
- Sign in yourself through your provider in a private browser window to prove it works.
- Tick Require single sign-on and click Save settings. Password sign-in is then refused for people on your domains.
When you are done
Sign-in goes through your identity provider, accounts follow your directory, and password sign-in is refused for your domains.
Articles for the pages in this guide
- Users & Permissions: See everyone who can sign in to Lavawall for your company and your clients, and control what each person can do.
- Single Sign-On: Let your people sign in to Lavawall with your own identity provider, and create or deactivate their accounts automatically.
Still need help?
Search the support centre, or contact our support team and tell us which step you are on:
- Chat now: use the chat button in the bottom-right corner of this page to reach our team right away. Where cookie consent is needed, the chat starts after you accept (cookie settings).
- Email: send our support team a message through the contact page. It goes straight to a person.
- Phone: AB: 1-403-538-5053, BC: 1-778-731-1339, ON: 1-289-724-8829, US: 1-406-988-7333, UK: +44 20 3695 9786.